"Her hands are busy spinning thread, her fingers twisting fiber." Proverbs 31:19 NLT

Monday, May 19, 2014

Baby Love, #2

As noted in a previous post, Baby Love #1, I had not ever knitted baby gifts until last summer. And as noted in a previous post, Fiber Snob, I am no longer a fiber snob after taking a Faire Isle knitting class where we made hats from store-bought yarns. So now I think I can make baby gifts. :^) 

These pictures are of baby gift 2 and baby gift 3, both Faire Isle hats for ~ a 9-12 month old, hopefully. The purple one is for a little girl, my only sister's only daughter's new baby. Her baby was born in April. The greenish teal hat is for a dear friend's yet-to-be-born baby boy. 

The yarn I chose was Cascade Yarns, 220 Superwash Sport, which is obviously sport weight. It is 100% Superwash Merino and is wonderfully soft. I love it. The colors are white, wistera (I think) and maybe dark aqua. But if you go to the link above or search elsewhere on-line, you will find a wealth of colors from which to choose. 

The color pattern I used in class was a copyrighted pattern, but I later began using this one and I really like it. It is especially cute on baby hats - and it's pretty nice on adult hats, too, like, say, mine. So I thought I'd share what I did in case anyone wants to make one or several, too. For the girl hat I used a braid edging which I think is pretty easy to find on line, like at this site. The one I used was actually part of the copyrighted pattern so I'm hesitant to post it but the link is about the same thing. If you have questions, or want to know how mine is done, ask in the comments section and I can accommodate you.  

So for both hats I used 12" circular (which are mighty short) needles, sizes 4 and 6. I cast on 92 stitches on the #4's and did the edging, either the *braid* or the *K2 P2 rib for 6 rounds*. Of course, use a stitch marker or small ponytail band to show where the rounds start. 

When the edging was finished I switched to the number 6 needles and during the first row of the body (which is a solid row of the MC [Main Color]), I made a stitch 4 times, evenly spaced out, making 96 stitches. (The main part of the color chart needs to be divisible by 6 but the top 2 sections of the color chart [the little 'v's'] need to be divisible by 12.  
( I changed the very top section of this chart in the actual hats. What I did in the hats was the same as the very first section of the color chart except the first and fourth rows of that section being the MC instead of the CC [Contrasting Color]). I'm sorry for any confusion - if anyone needs it, I can get you the right chart representation. But the chart as it reads works well, too.

After the first row of the chart (which is that increase row) continue on with the chart. After the last row of the chart, begin the crown decreases as such: 

NOTE: Change to dpns (dividing sts evenly between 3 needles) when there are too few sts to work with circular needle. And the crown will be done entirely in MC, so leave a 8" tail of CC and cut before beginning directions below.

Rnd 1-  *k6, k2tog; rep from * around
Rnd 2 and all even rounds, knit around
Rnd 3-  *k5, k2tog; rep from * around
Rnd 5-  *k4, k2tog; rep from * around
Rnd 7-  *k3, k2tog; rep from * around
Rnd 9-  *k2, k2tog; rep from * around
Rnd 11- *k1, k2tog; rep from * around
Rnd 13- *k2tog around

When finished, leave at least an 12" tail, thread the yarn through the remaining stitches (I usually go around the remaining stitches several times, tightening as I go, to make a strong, tight "tip-top".)  Then weave in all the ends. 

I always block these hats loosely on a balloon (don't stretch the ribbing or braid by a balloon that's too tight) and VOILA - you have an adorable baby hat. 

Let me know if you want to make one and my post was entirely too confusing. I'm sure I can straighten it all out!!!  :^)

And below you will find an adorable newborn in her adorable new hat - meant for her to wear next winter. The little boy's excited family has just a few more days to wait. 

Adorable!

Don't 'cha just want to kiss those baby cheeks?


Friday, May 16, 2014

Week-End Pics

A few odds and ends as the week ends...again!

1) I just got this in the mail today from my mom. She's been crocheting for a fund-raiser at her church and she sent me one of these unique book marks. I love the delicate thread crocheting. To see some of my mother's doilies from days gone by, go to this link.

 2) I also got these beads in the mail today from Beadhaholic.com. I got them for a lacy scarf for a Christmas present. The beads go on the ends of the scarf to be pretty, of course, but also to give the light weight lace some weight to keep it in place. BUT they are too small. I ordered the size the pattern says (8/0) but they won't work. Fortunately, the entire order was $6.00, including shipping. I guess I'll be making a trip to Jo-Anne's soon. I think they just may carry some beads. Must remember to take my lace weight yarn with me.


3)Got a faire isle hat finished this week for a grandson. 3 more to go. I'll be posting the color chart for this pattern next week.

4) I did something that's probably not very thrifty - with hubby's encouragement. I bought this on eBay just yesterday. An Ashford Traditional spinning wheel. I've been eye balling them for a while - it is like my very first spinning wheel which I gave away. I don't need it but it was a very good price - used and refurbished. It is coming from New Zealand, home of the Ashford wheel, so I won't get it for a while. But I'm not hurting for a wheel so that will be okay. It'll be for posterity. And for more authentic looking demonstrations. And I might be able to come up with a few more justifications - just give me time!


5) I'm toying with the idea of spinning a bit of yarn with my golden doodle's tail hair. Not sure if I really want to do that, but I've been saving it. It might be nice as a bit of trim in hand warmers.
Just look at that tail!

This is the approximate idea.

6) Got some coleus, sweet potato plants and snap dragons for the pots out front. Just need some short-ish grass to finish them off. But we had a light frost last night and another possible one tonight. Guess we'll be keeping them watered in their greenhouse pots and move them back and forth from the garage to the porch until planting time.


7) We've had a busy bird week. Just tonight we had 5 male Northern Orioles at the feeders and a female AT THE SAME TIME. Crazy!! And we've seen an orchard oriole several times, too. They are eating jelly like, well...like it's goin' outa style. (Fortunately for us humans, jelly is NOT going out of style.)
Male Northern Oriole


Male Orchard Oriole


We've had a nice, quiet week with few obligations. And it's supposed to be a bit spring-like the next couple of days up here in the Northwoods. You have a nice weekend, ya hear?

Thursday, May 15, 2014

Baby Love, #1

Being that, for most of my adult life, I was primarily a "knitter from hand spun" and was, as previously noted, a Fiber Snob, I had not knitted baby things. Corriedale wool, while it's wonderful, isn't quite soft enough for baby things. I must say, however, that in recent years I have found good merino to be of excellent baby quality but items made from such are still not machine washable. And there's this: even though I have made full-fledged sweaters long before I made hats or knitted anything on Double-Pointed needles, I think I found baby sweaters and booties a bit daunting. There, I said it. I'm not sure why but I did. So I just bought baby things.

And then last spring one of  my dear friends, Catie, announced that she was expecting a baby. Very exciting news. Did I mention that my friend is also a knitter? ~gulp~ I decided I just had to do it - knit a baby sweater. It took me a long time to find a pattern. L-o-n-g time. But then I settled on this - Pink Lemonade Hoodie. In thinking about colors, I decided on a sage-y green because she hadn't yet learned whether she was having a boy or a girl and my friend loves greens.

The yarn recommendation on the pattern is for Lion Brand Baby Wool. (It appears that the color I chose is no longer available, at least at the link I gave.) And, as you can see, Catie learned the little one growing inside was a boy, so I got the same Lion Brand yarn in blue for the trim.

The pattern calls for garter edging for the sleeves and bottom but I decided to do a stockinette roll. Love that look!

The sleeves were the first component on the pattern so I dutifully knitted up two of the cutest little sleeves I'd ever made!!! They were so adorable. The body is knitted on circulars to hold the number of stitches but are worked back and forth, not in the round (it's a cardigan). I was about half way up the body when I realized the pattern calls for those cute little round sleeves to be attached to a FLAT garment. I had never heard of such a thing. So I sought help from a local yarn shop owner/knitter and she helped set it up. As it turned out, she had just finished a lovely adult sweater with the same instructions, or else she wouldn't have known what in the world it meant, either. For those of you who don't know what I'm talking about, you do exactly that - you stretch out those sleeves to as straight a line as you can and put them on the needle at the right place on the body and knit. It's really hard for the first couple of rows and it did hurt these old finger joints of mine, but I got 'er done. However, let me just say, I don't plan on ever doing a sweater like that again!

With all that said, it is a very cute little hoodie. I didn't make it for a new born but more for a 12 month old.  However, the little guy was huge, 10 pounds of beautiful baby boy. And he's still a bruiser - an all smiles, happy, adorable bruiser. So the sweater is just about too small already - and he's only 8 months old. Heirloom, I say, heirloom.

I found these great little buttons to match the blue trim. Aren't they just the cutest? And one other thing of note, as you decrease above the sleeves to form the yoke, you get these great little puckers in a regular pattern which add so much charm. So with that, I'll just leave you with the rest of the pictures.


Here he is modeling for us with his adoring
sisters.
Did I mention adoring?


Tuesday, May 13, 2014

It's A Wrap - Again

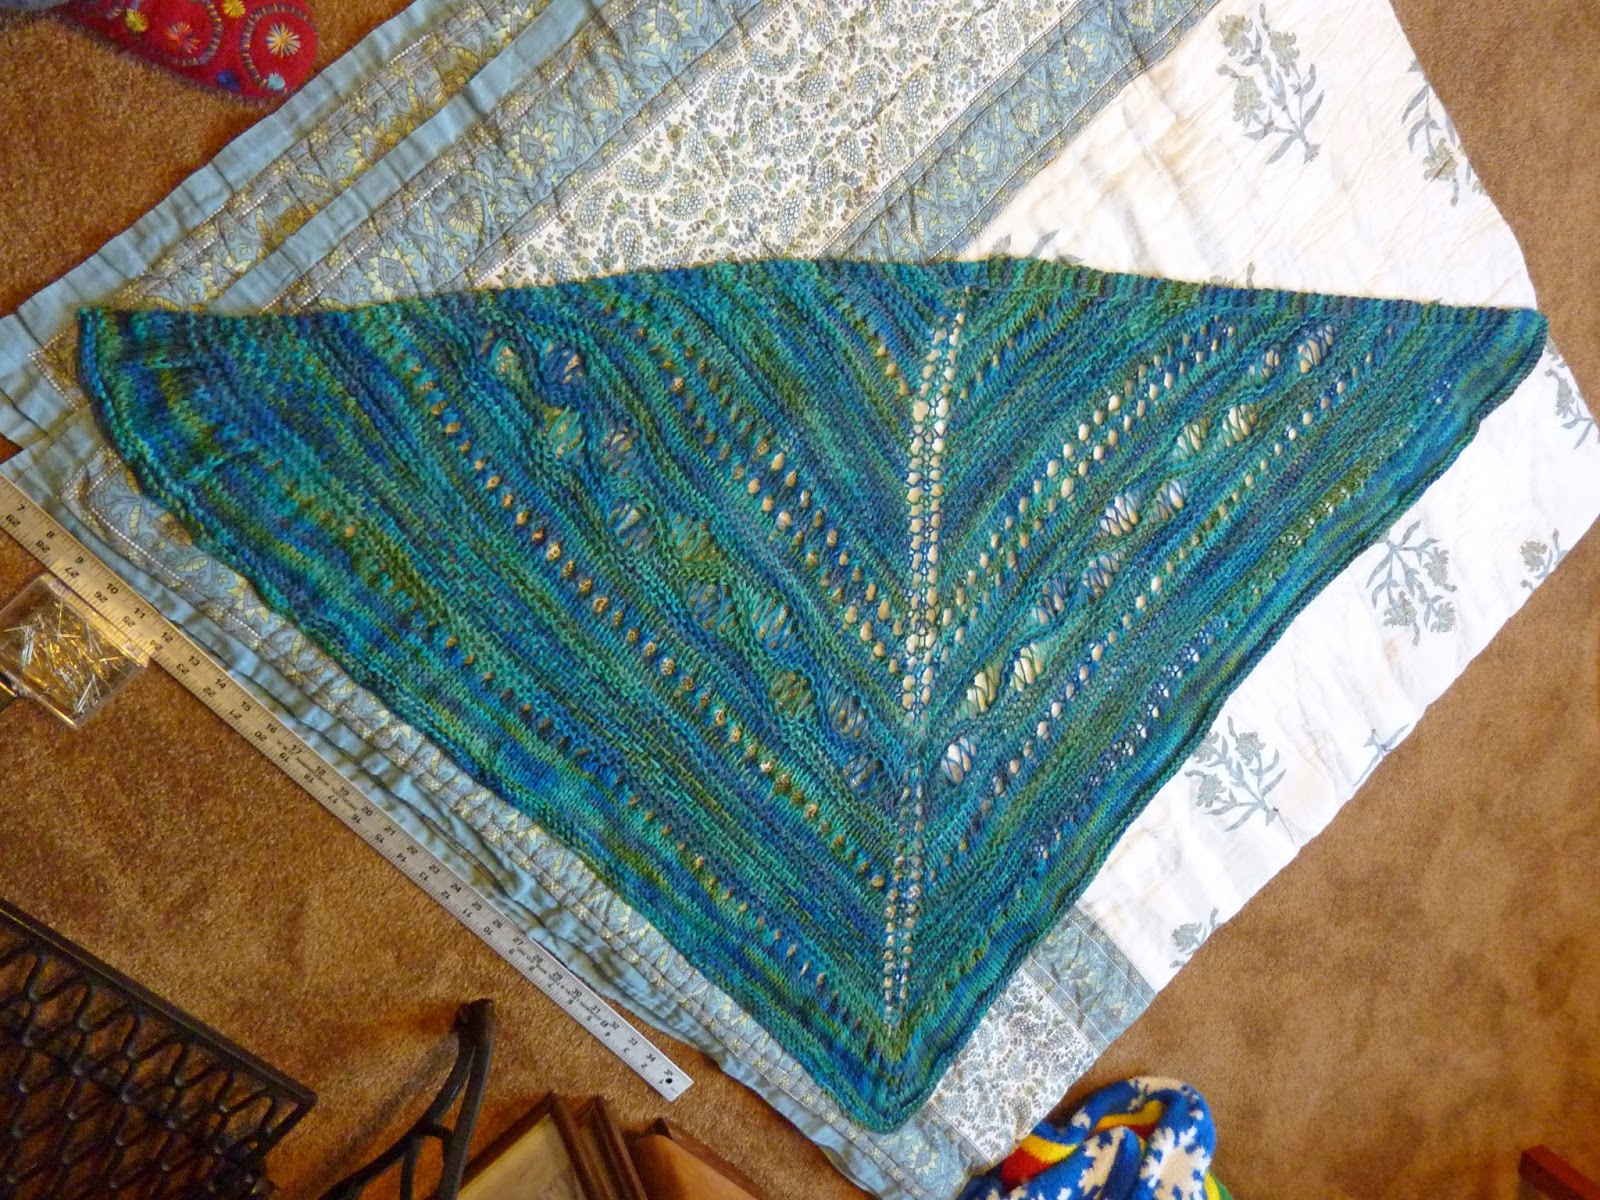
Ree Drummond, Confessions of a Pioneer Woman, says you should never blog about the same thing twice. But, well, I've just finished another Faraway, So Close shawl by Carina Spencer.  And I paid for the pattern so I might as well get my money's worth, right? And bore any readers with the same topic, right?

So, here goes: Of course it is similar to the shawl in this post of mine, but I made the shorter version and I'm definitely planning ahead - it's a Christmas gift! Although, I just realized the other day, it is already the 5th month of 2014 - just 7 months until Christmas!!! And it's still pretty cold from the last one up here in the northwoods. :)

This time I chose Cascade 220 Paints yarn and the color is Juniper Berries, 9997. It took almost exactly 2 skeins (as I finished up, I was afraid I would run out and have to break out another). This is a lighter weight worsted, #4 so I used a larger needle than last time - size 11. I believe the finished product is a bit larger than the dimensions given in the pattern, but bigger is better, right??? Hopefully the recipient will agree.

I did end this one a bit differently from the pattern recommendations. The pattern calls for a single garter row after several stockinette rows and my first one curls a bit too much around the edges for my liking. So this time I added 4 rows of garter and it blocked up much nicer.

There's not much more to add besides what I said in my previous post. Except to say, it is a great pattern and really fun to make. I highly recommend it. I'll simply show it off with these pictures.
Here it is while being blocked. I love the multiple yarn over
effect.

Never mind the Bucky Badger PJ pants!


Gotta go - I have another Christmas present on the circulars - and several more to go.  :)

Friday, May 9, 2014

Nests of Fiber???

I have been an avid bird watcher since I met my late husband back in college in 1973. He was a senior and we met just after he had returned from an inter-term ornithology class in the Florida Keys. He was so excited about all the birds he saw and passed that excitement on to me. Some of our dates were meeting EARLY in the mornings (like 5:30) to go, yes, bird watching. We did take some kidding about that.

While we lived on the "upper 40" all those years before his death, we always had bird feeders, bird baths and bird books available for us and them, faithfully marking in our Birds of North America book any new ones we saw and when and where.


Somewhere in those years, our dear elderly neighbors (although they were probably about my current age when we met), gave us tips about feeding our avian friends. The Mrs. was also a spinner and weaver and encouraged us to put out natural fibers with which the birds might build their nests. She said bright colored yarns might enable us to see the nests up in the trees later on. We did but it didn't. :) I don't believe we ever saw any of our contributions to nests up in the trees.

Move ahead here with me some 15 or so years to last year. My second husband and I had been in our new home almost 3 years and up to that point, we had not put out any yarns for the birds since moving in. He remembered that we should be doing just that so I gathered up some hand spun corriedale yarns in about 3-4 inch lengths and some colorful Sugar 'n Cream cotton yarns that I have used to make knitted dish clothes. But it never appeared that any were taken and we definitely never saw any in nests. Actually, we never saw ANY nests. Just the babies later on.

So this year my husband decided to tackle this situation head-on. He purchased this beast (right hand pic). :)  He is trying to convince himself that things have been taken from it and we will definitely have the thrill of locating nests from afar. I lovingly pat him on the back while thinking, "I believe all the rain we've had has tamped down the fluff."  I guess we'll see...or maybe not.

Meanwhile we have had a cold and rainy spring, with little bird activity. Then all of a sudden this week, we've had all our migrating friends return back to their summer homes.

Of course, all winter we have seen the usual year round cardinals, black-capped chickadees, goldfinches [dulled in color], tufted titmice, various types of woodpeckers, both white-breasted nuthatches and the smaller red-breasted nuthatch (although I'm not sure the red-breasted nuthatch stays here all winter). But this week we've been regularly visited by breeding pairs of:
Male and Female Rose Breasted Grossbeaks
Hard to see, but 2 pairs of brightly
feathered Gold Finches


A pair of Northern Orioles eating jelly
A pair of Eastern (Rufous-sided) Towhees

Mrs. Bluebird and...
Mr. Bluebird   :)

We still have not seen the female Indigo Bunting,
though she is hard to distinguish from small
sparrows.This is a male.
And just this morning we spotted this Orchard Oriole
eating jelly, alongside Mr. Indigo Bunting.  
It has caused quite a lot of excitement around here as hubby scurries around to keep the feeders and jelly dish filled and I scurry around to get photos before they fright and fly off.  Still no signs of nests...not to mention, nests of fibers. We'll see...or maybe not.

Wednesday, May 7, 2014

A New Coat for Anna

I'm excited to blog about a book that I really like. Really like. It's called A New Coat for Anna.
It was written by Harriet Ziefert, illustrated by Anita Lobel, and was first printed in 1986.  It is a lovely story about a resourceful mother who came up with a creative way to get her little girl a much needed winter coat during hard times. The book goes through the steps of the "coat building" from the sheep all the way to the tailor. It takes place after World War II in, what appears to be a European town.  I always think it must be somewhere in Germany. There is no father in the story, which makes me assume that Anna's father never returned from the war. And there is no food, no money, and not much else available, either.

The dust cover intro reads, "Anna's mother has promised her a new coat when the war is over. But when the war ends the stores remain empty. There are still no coats. There is hardly food or money.

"How Anna and her mother get the coat, using their cherished possessions and a great deal of patience, will fascinate and delight young children. [insert my note: AND ADULTS, ALIKE]

"Based on a true story that happened after World War II, Harriet Ziefert's inspired telling and Caldecott Honor Book artist Anita Lobel's poignant illustrations are a stirring affirmation of the indomitable human spirit.

"Here is a deeply satisfying picture book, as entertaining as it is instructive, that children will want to hear again and again."

Anna's mother gets the idea to barter with the various people who have the materials and skills she needs for a coat. She uses some of her valuable possessions and each person with whom she talks is delighted to get a nice item in such hard times. You will be pleased as it goes through the process of the farmer shearing the sheep, the little old woman spinning the yarn, Mother and Anna dying the yarn in their kitchen, the weaver weaving the cloth and the tailor measuring and stitching up the coat.
This is me in 2003, in a 2nd grade classroom,
where I had been demonstrating spinning,
finishing with the book, which is sitting
on my lap.

I've read this book to many children's groups when I've demonstrated. And recently have begun even reading it to adults, also when I demonstrate or teach spinning. Sometimes I feel embarrassed to read it to grown-ups, but they always love it and want to look at the pictures closer afterwards. (TIP: I have the text of the book printed up and read from it while I hold up the book so the hearers can study the pictures while it is being read.)

As I prepared for this post, I "googled" the book title and found there are a few videos on You Tube of the reading of the book. Here is one of them. There also appears to be activities to go along with the book and here are even some PDF downloads for home schoolers (or anyone, for that matter) to go along with the book.

Lastly, the book is available from several on-line vendors and they will show up when you google the book title.  The first link of this post is to good ol' Amazon, but there are lots of other options.

If you love fibers, sheep, spinning, creativity, a mother's love, you will love this book.


P.S. Just found a nice blog post about dyeing cotton with Kool_Aid AND it also features A New Coat for Anna.  :) It can be found here. 

Saturday, May 3, 2014

Dye-ing for Kool-Aid

Did you know wool can be dyed with unsweetened Kool-Aid? I'm guessing that isn't news to most fiber people. Or to any mother who has tried to get Kool-Aid stains out of a carpet or a child's t-shirt. Since wool takes dye so well, it also takes Kool-Aid very nicely.  It is a great activity to do with children - they love Kool-Aid and they will love the colors you can get from it AND they will love the easy process. Plus, it's much safer for them than dying with chemicals. (Once you begin thinking of Kool-Aid as a dye, you will love the color selection.) And you will love how the dyed wool smells for many years when it has been stored and then opened up - like a fruit salad.
These were done MANY years ago when I was a very new spinner.
The top one was with, of course, grape. The lower one was something
with peach in the name - I don't think that is still available.

I was never too interested in "natural" dying because it isn't supposed to be very colorfast. I have used chemical dyes and get wonderful results. But I've also really enjoyed Kool-Aid dying and the color seems to be long-lasting. I have not, however, used Kool-Aid when I needed a particular color - it doesn't seem to be an exact science! 


To me, it's more for the fun of playing with the colors. And then having some fun wool to spin up and use in mittens or hats.


It's very easy. There are many ways you can heat up the water - crock pot, microwave, even over a fire outside. I use a large vessel in which to boil water on the stove top, with enough room for the fiber, as well. I have used the bottom of an enamel roaster and I've used an enamel canner.  In this instance I am using a large, antique enameled pan because the inside is white and it should show what I'm doing nicely. We'll soon see!

It doesn't matter how much water you use, as the wool will absorb the color that is available - no matter how much water. You need enough water to fully submerge the wool.

While the water is warming up, I add the Kool-Aid and pour in a "good amount" of salt.  Salt helps the color set, but I've never measured it - maybe somewhere between 1/4-1/2 cup. Stir the mixture until it is dissolved, which doesn't take long since the water is getting hot.


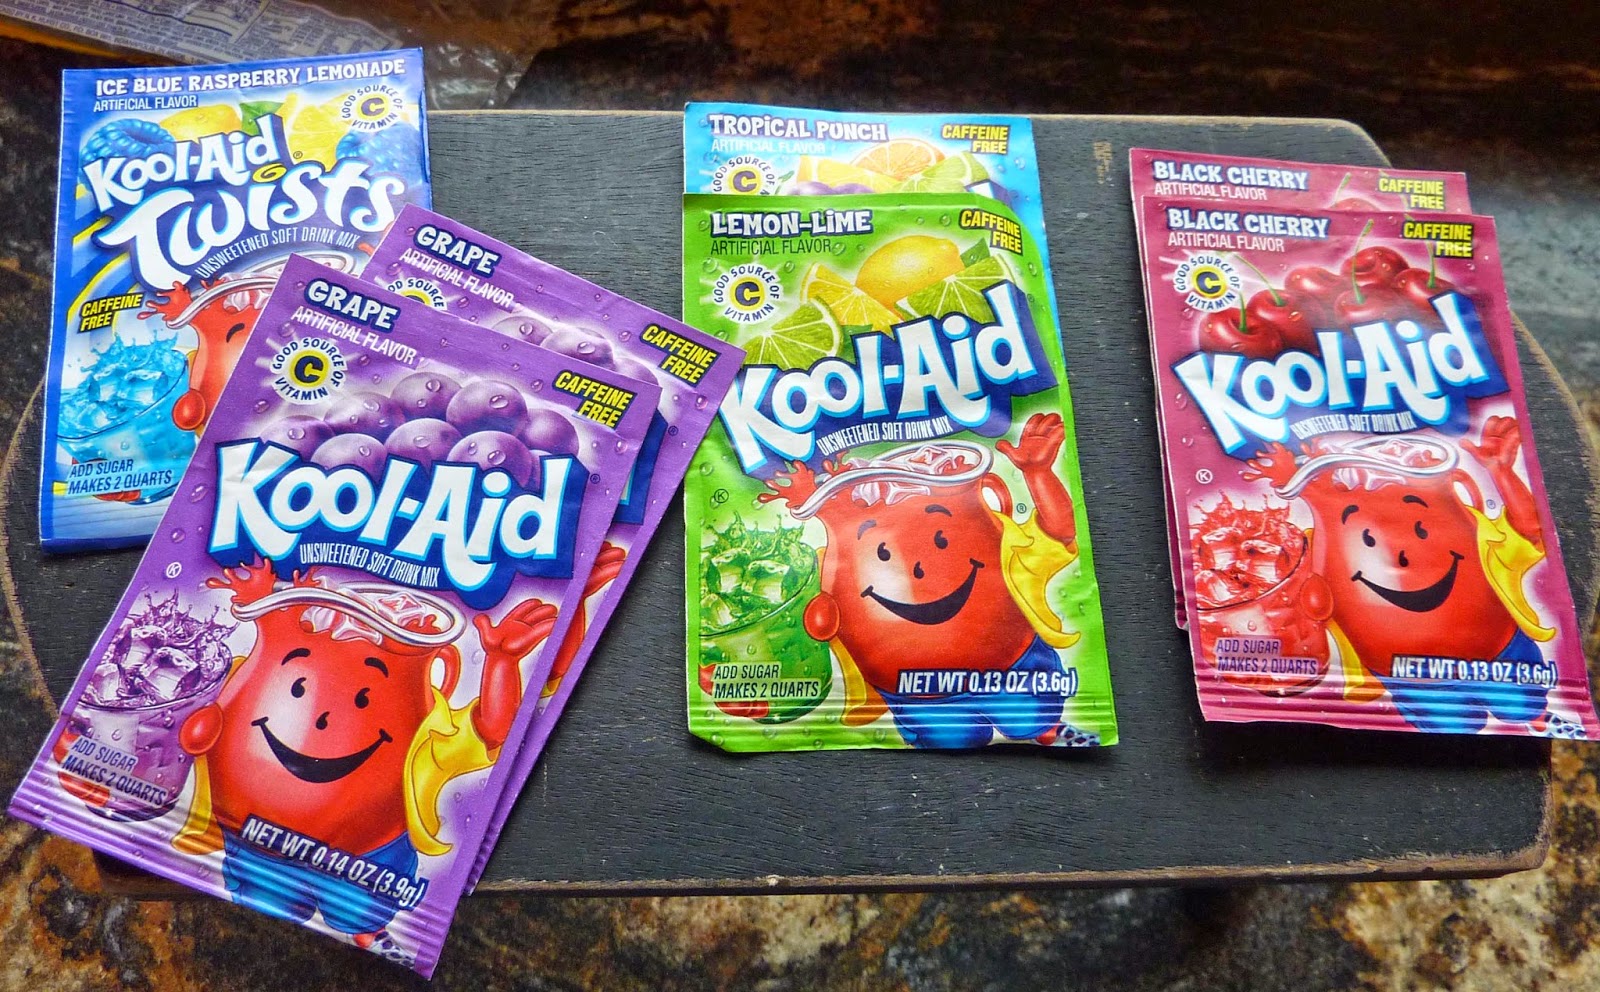
For this batch I used grape and tropical punch (red).
While I am heating up the water, I use another container to get the wool wet. Put in very hot tap water and then gently push the wool down into it - then it will be ready to put into the dye bath when that is good and hot. 

I get the dye bath water to the point of sending up wisps of steam. Keeping it at that point, I gently add the wool, pushing it down into the water - gently to prevent felting. Then I leave it alone, just keeping an eye on it to make sure it doesn't begin boiling. I leave the wool on the low heat for about an hour, but longer is okay, too.

Notice that the water still has color but the wool begins to
absorb the color right away.

Little by little, the water becomes clearer and the wool gets more and more color. You can gently lift out a tuft of wool to see the color it is becoming, keeping in mind that it will be a duller color when it's dry.

When the water gets a lot clearer than when I started, I turn the heat off. And to quote Alton Brown, "just back away. Don't touch it!" I left the wool in the water until it was about room temperature. The amount of time it takes depends on the amount of water you use. The wool continues to absorb color while it is cooling.
It was hard to show the water in the pan, but the wool seems to be reflecting into it because...

...here is some of the water in a clear glass.  Almost completely clear.  

When it cools to approximately room temperature (actually a bit warmer for me - I usually can't wait to see the wool), I pour out the water, gently remove the wool and fill the vessel with the approximate same temp as I dump out. I carefully put the wool back in, gently press it down into the water and let that set for a bit to rinse.

After it is rinsed, I lift the wool, careful to support all of it, and put it into my washing machine, being careful not to do anything with the machine except to set it on spin cycle. From there I spin out the water and when the spin cycle is finished, I remove the wool, and lightly lay it out on a cloth atop the carpet. You can use a blanket, towel or even just the carpet. Or, if it's nice outside, you can lay it out on a sheet in the yard (if you can keep the neighborhood dogs and cats from messing it up.)

I have not had such variation in color before. A lot of the tips are especially
dark. I'm excited to see how it all evens out with carding. I suspect
the yarn will have some variation of light and dark. Nice!


Two final pictures - a batch of wool I dyed a while back.  I used a pack called Kool-Aid Twists and the color "Ice Blue Raspberry Lemonade."  Isn't this luscious: 

So great!!

And one final note, all the while I have been talking about washed, uncarded wool. However, store bought or hand spun 100% wool YARN can be dyed in Kool-Aid, as well.

Have fun experimenting with the color.

P.S. Say, if anyone has ever dyed t-shirts or other cottons with Kool-Aid, I'd love a comment on how it worked.  Thanks!

Hey, I just found a blog post about dyeing cotton with Kool-Aid and it's about A New Coat for Anna. :)  It's found at here.